

1:1s Updates
Team member and Personal Notes
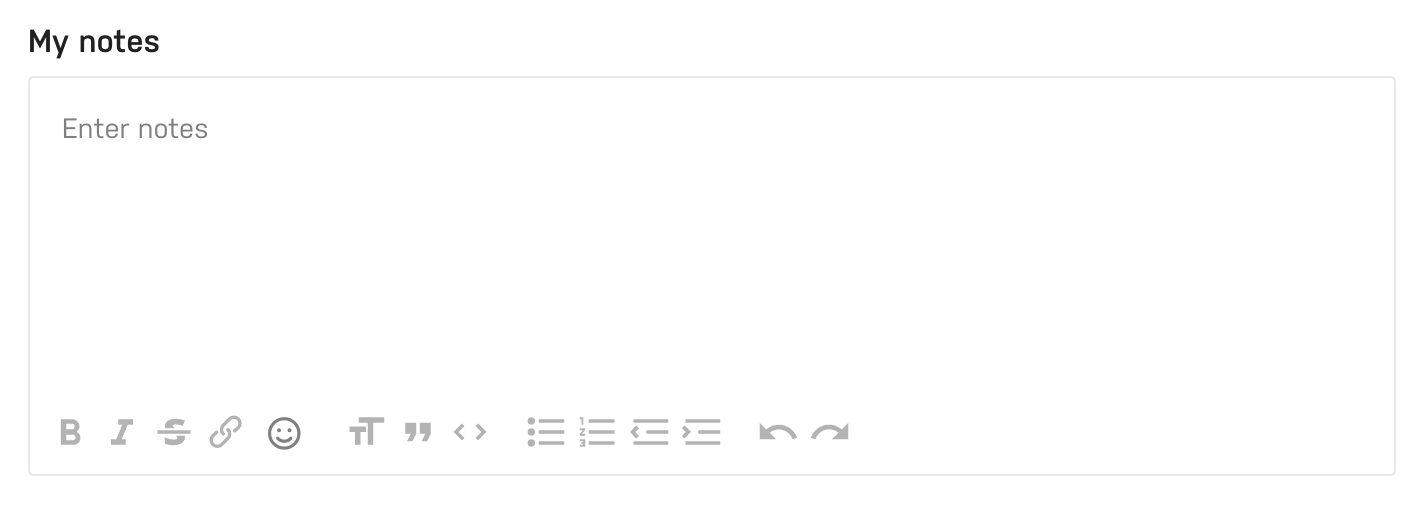
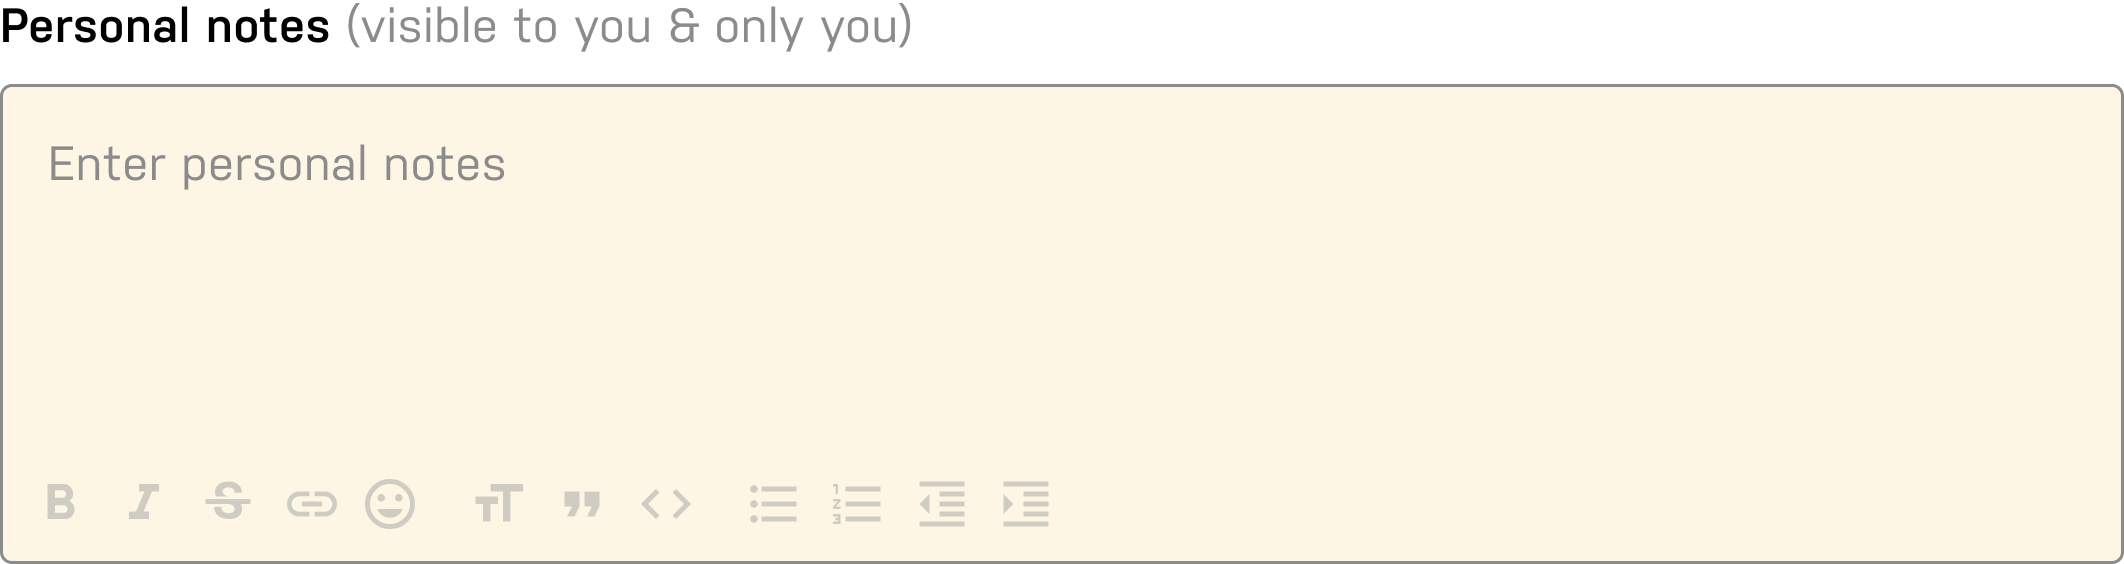
What is it?
We now offer a specific notes section for Personal Notes as well as Team Member notes. Personal Notes are completely private to you and only you, regardless of role. Team Member notes allow a space for the team member to contribute important information to their 1:1 sessions.
Why does it matter?
The differentiation between the different notes fields allows for better team member participation and better organization of thoughts around 1:1 sessions. Team Members can prepare their own talking points, or take personal, private notes to remind themselves of important pieces learned for next session.
How do you use it?
Team members will see Personal Notes and Team Member notes within their 1:1 session and can fill them out as they see fit.
Multiple 1:1 drafts
What is it?
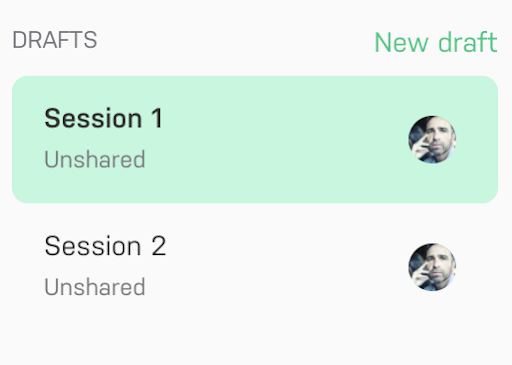
We’ve built the ability to have multiple 1:1 drafts.
Why does it matter?
This allows each coach to have their own session without interfering with what another coach may be preparing.
How do you use it?
Simply create 1:1 sessions and see the drafts in a list!
Kudos update
What is it?
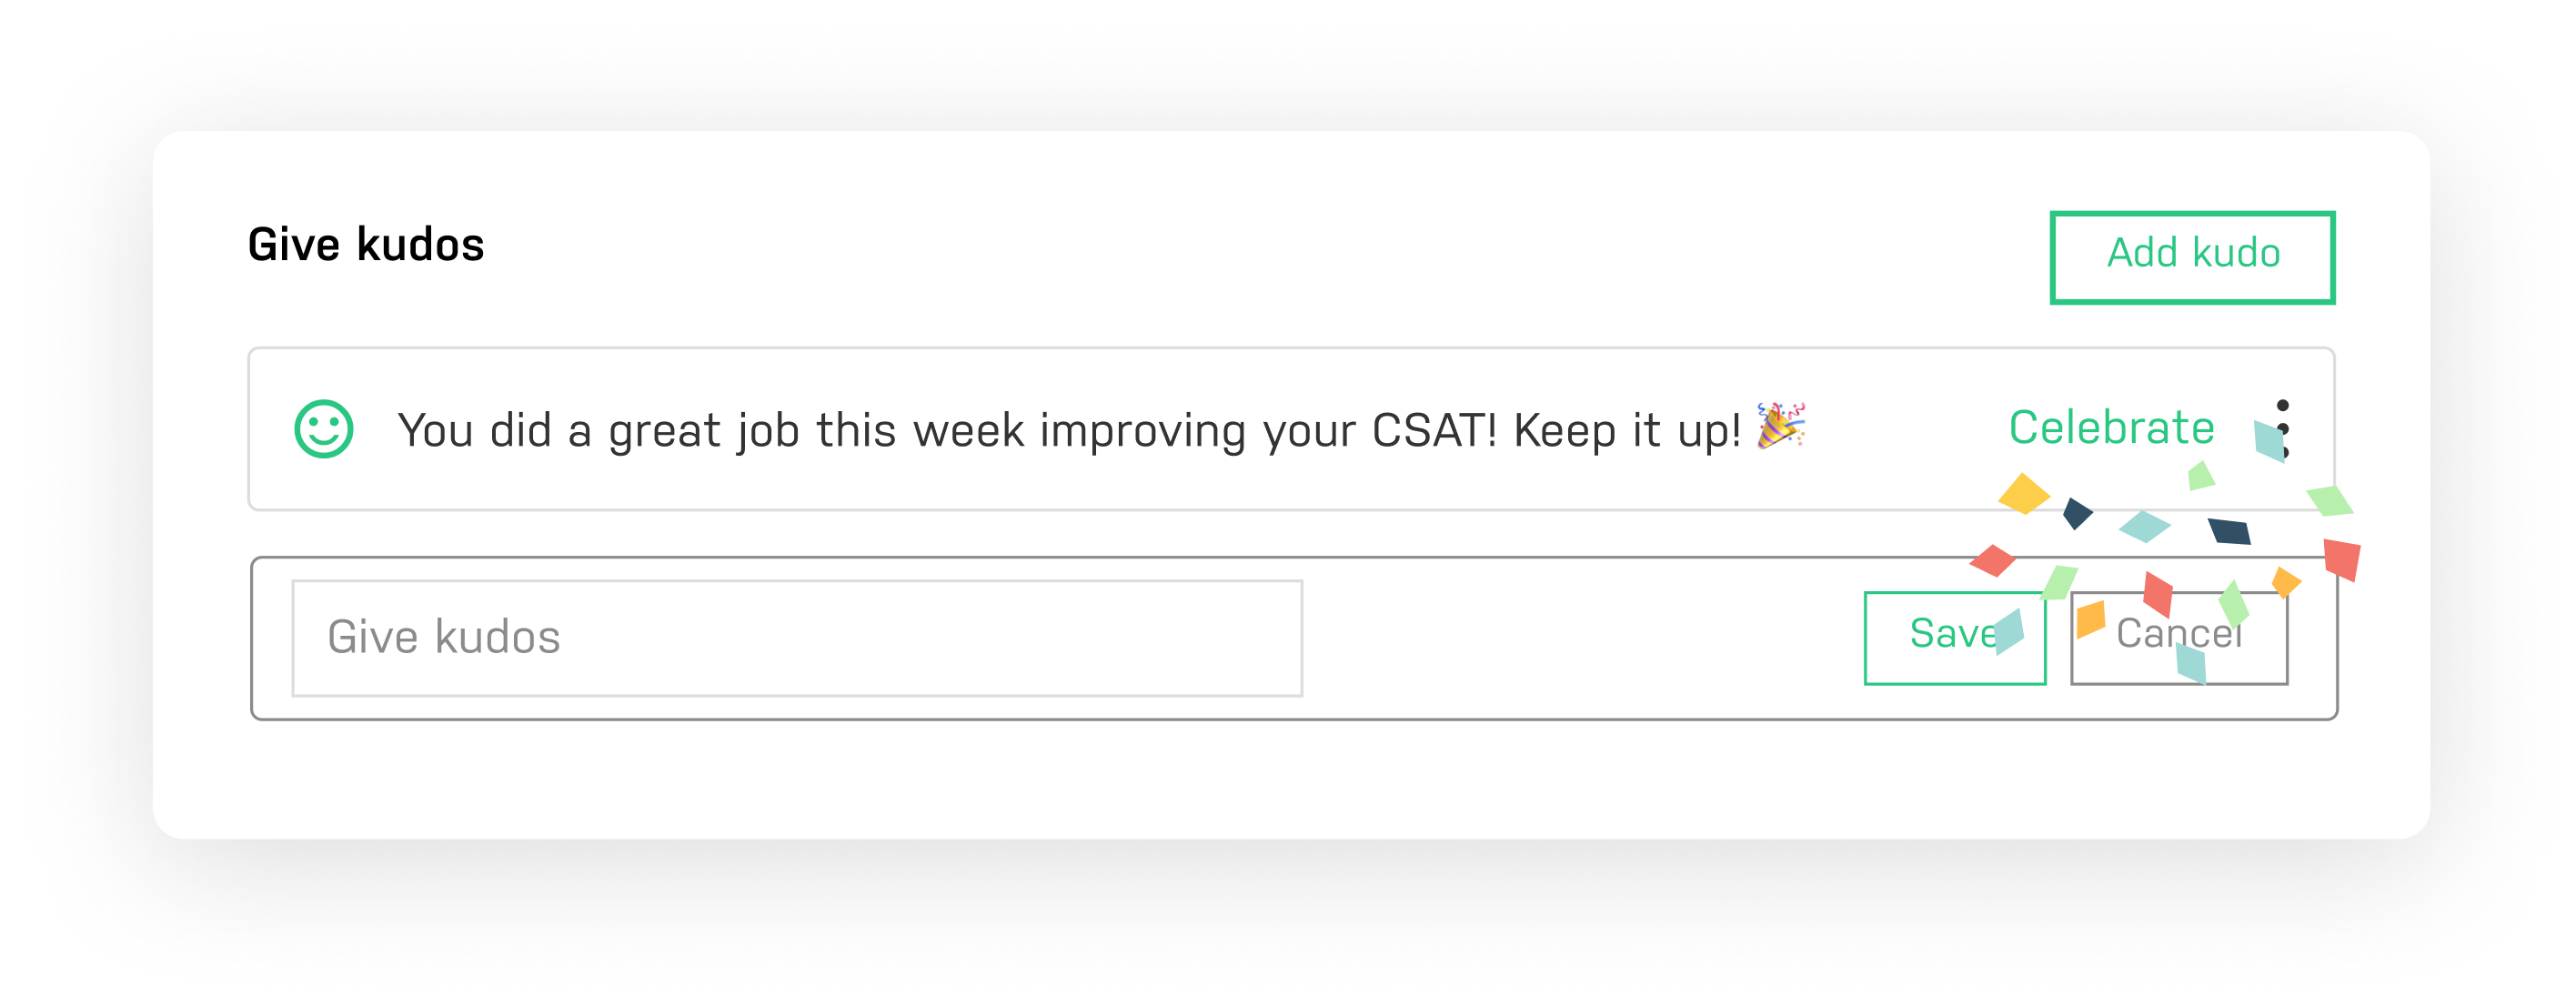
Kudos are no longer limited to one per session! Now coaches can give multiple kudos within a single session! Kudos can now be celebrated right inside of a 1:1 session.
Why does it matter?
Celebrating your team member’s success is incredibly important and now you can celebrate in the Stream and within your 1:1 session! Feel free to list as many kudos as they’ve earned!
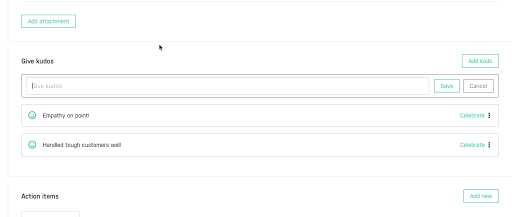
How do you use it?
Simply add kudos when setting up your session. The "Add Kudos" button will lock your Kudos item in place and you can begin to type a second or third. When in the 1:1 session, click the “Celebrate” button to the right of the kudos and watch the confetti fly!
Updated email recap for 1:1s
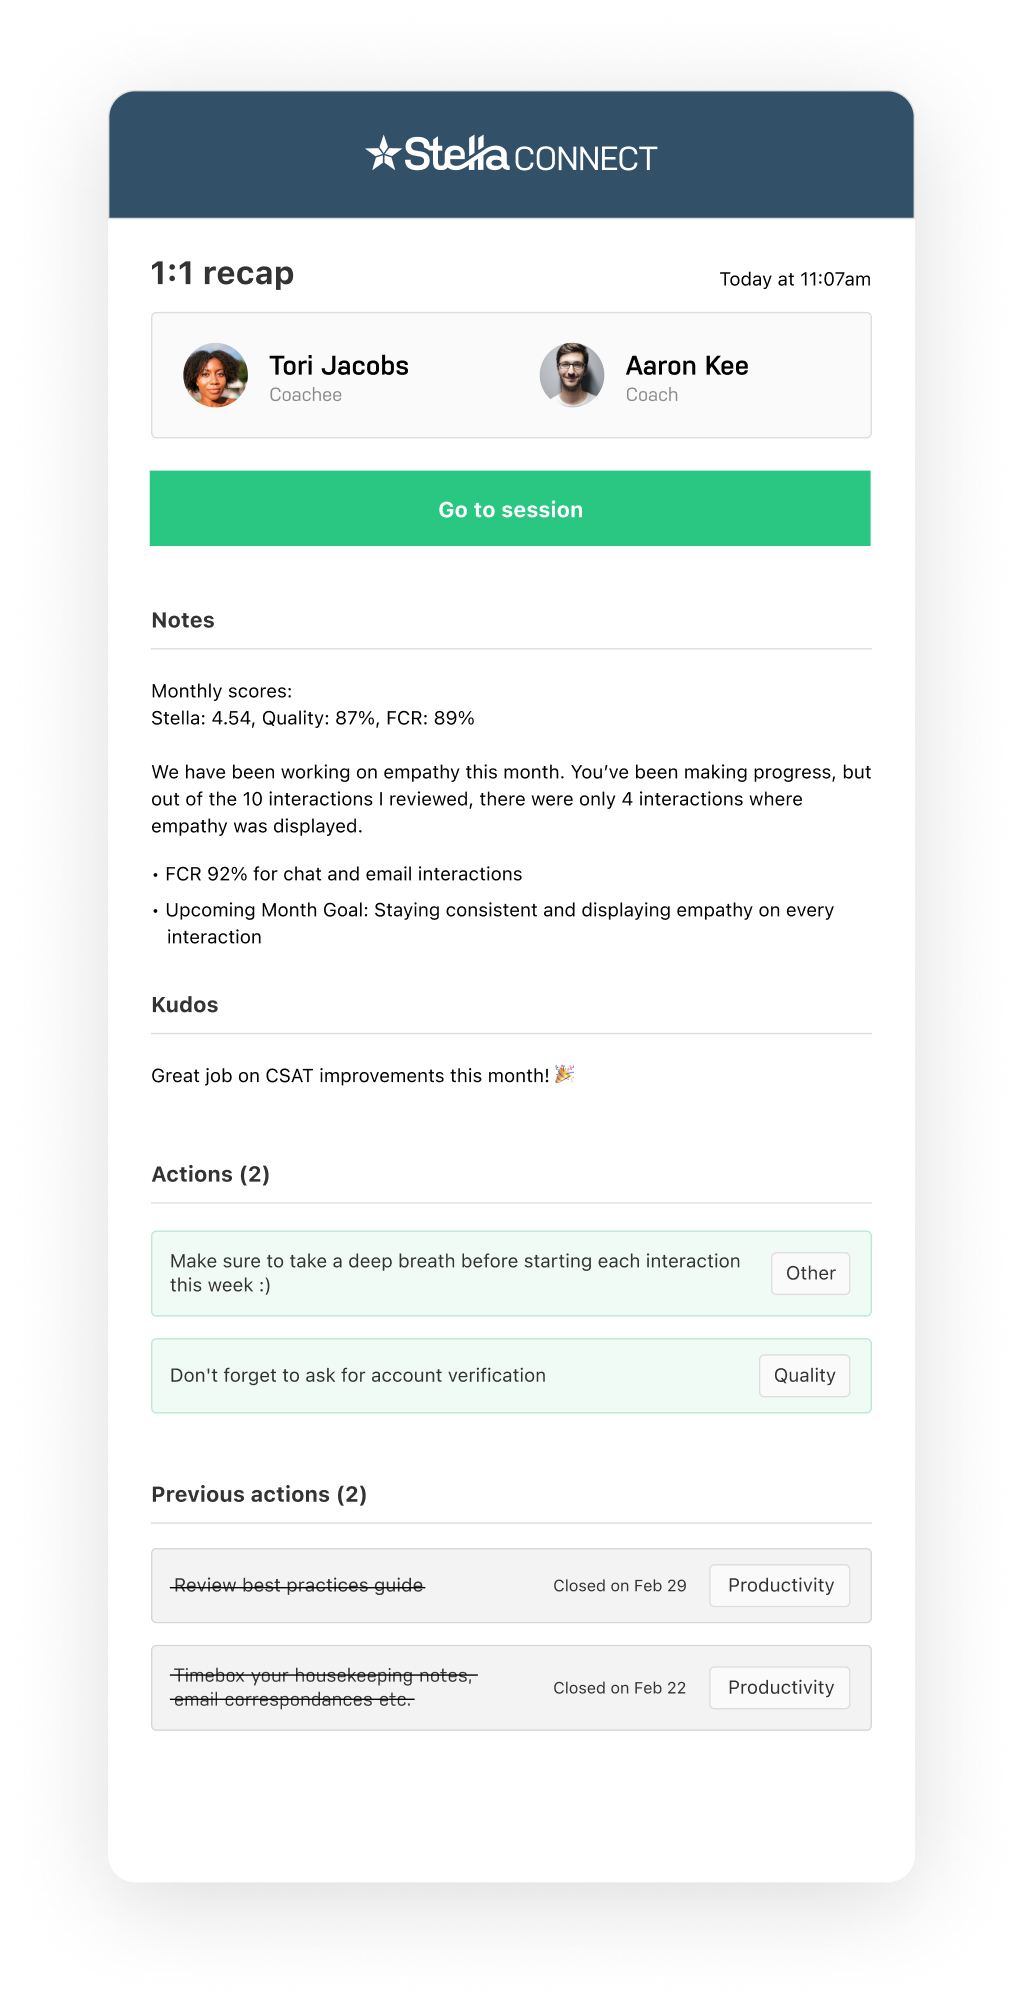
What is it?
We’ve fully redesigned your 1:1 email recap for the best possible user experience.
Why does it matter?
You can now view and revisit the important and exciting points discussed in your 1:1 in an organized and digestible way. This will also allow for your coachee to have a record of what was discussed.
How do you use it?
Complete your 1:1s and we’ll do the rest :)
Private 1:1s feature / new default state of visibility for 1:1s
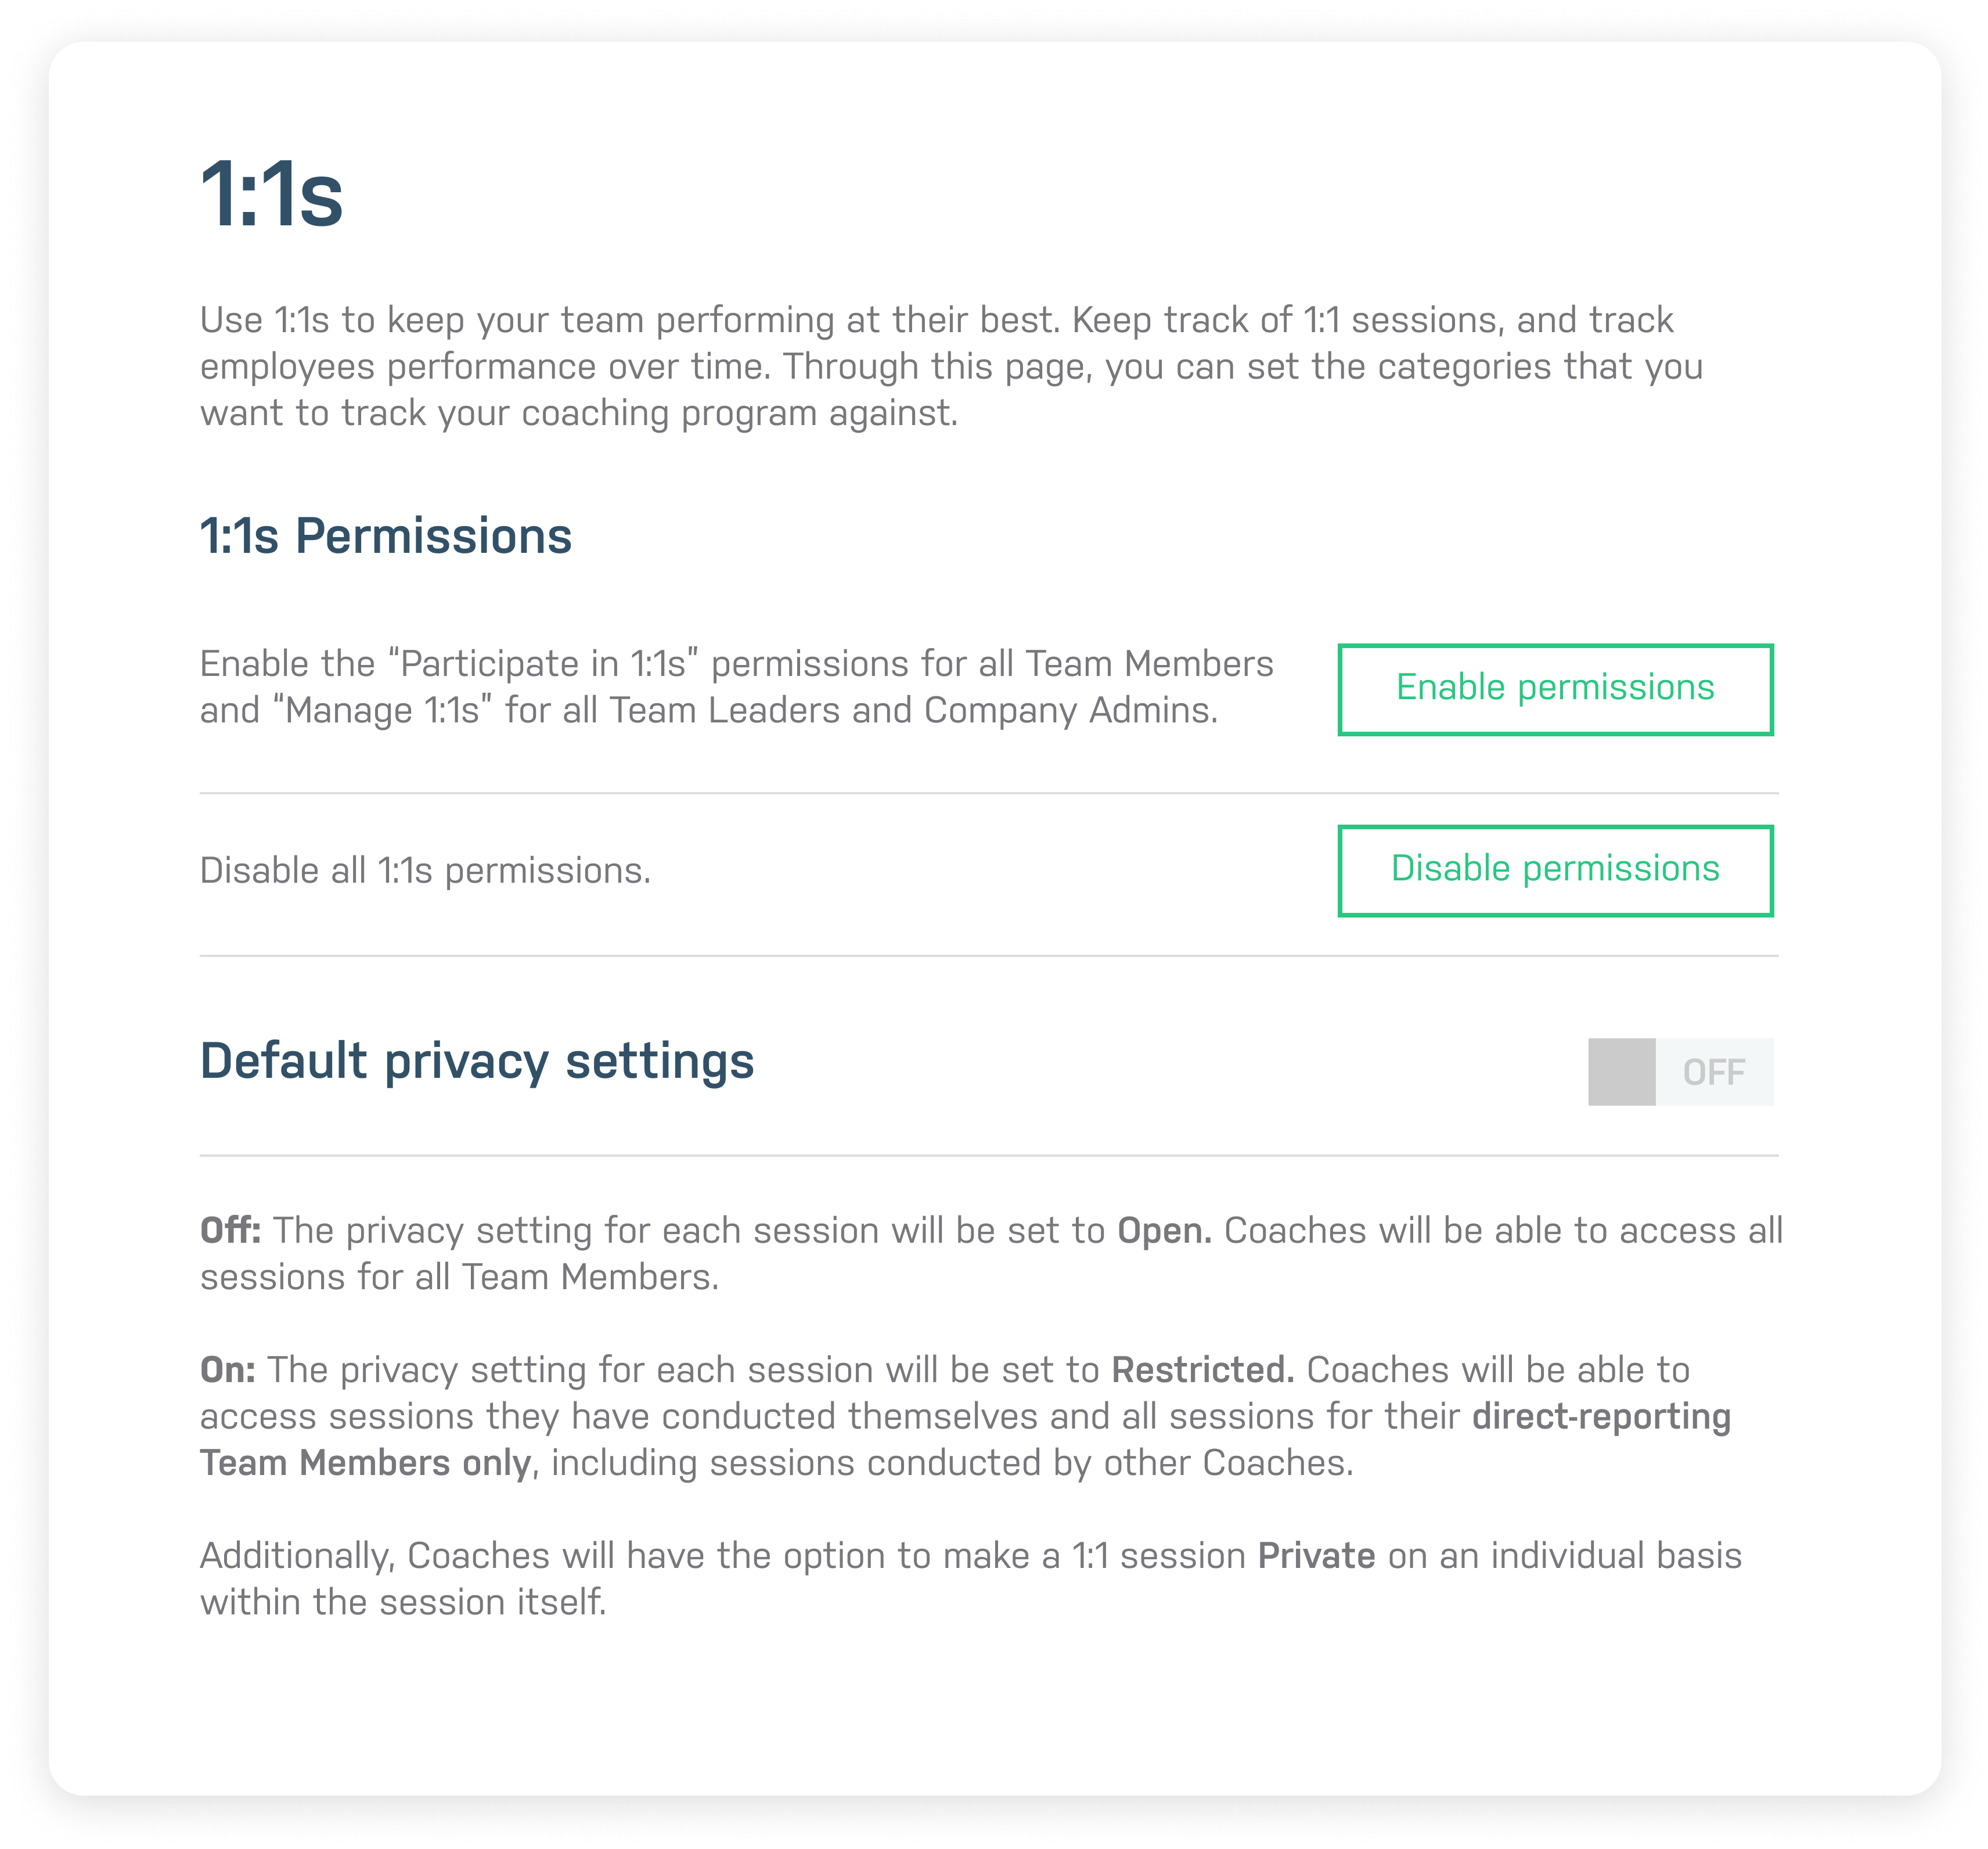
What is it?
Private 1:1s introduces two new methods for setting coaching session visibility. Admins can set the company’s default level of visibility, and for further privacy, coaches can mark individual sessions as Private with just a click.
Why does it matter?
At Stella Connect, we believe that co-coaching is vital to a support organization’s success -- managers, mentors, and peers all play a part in meaningful coaching, but we also recognize how important it is to let private conversations be just that, private.
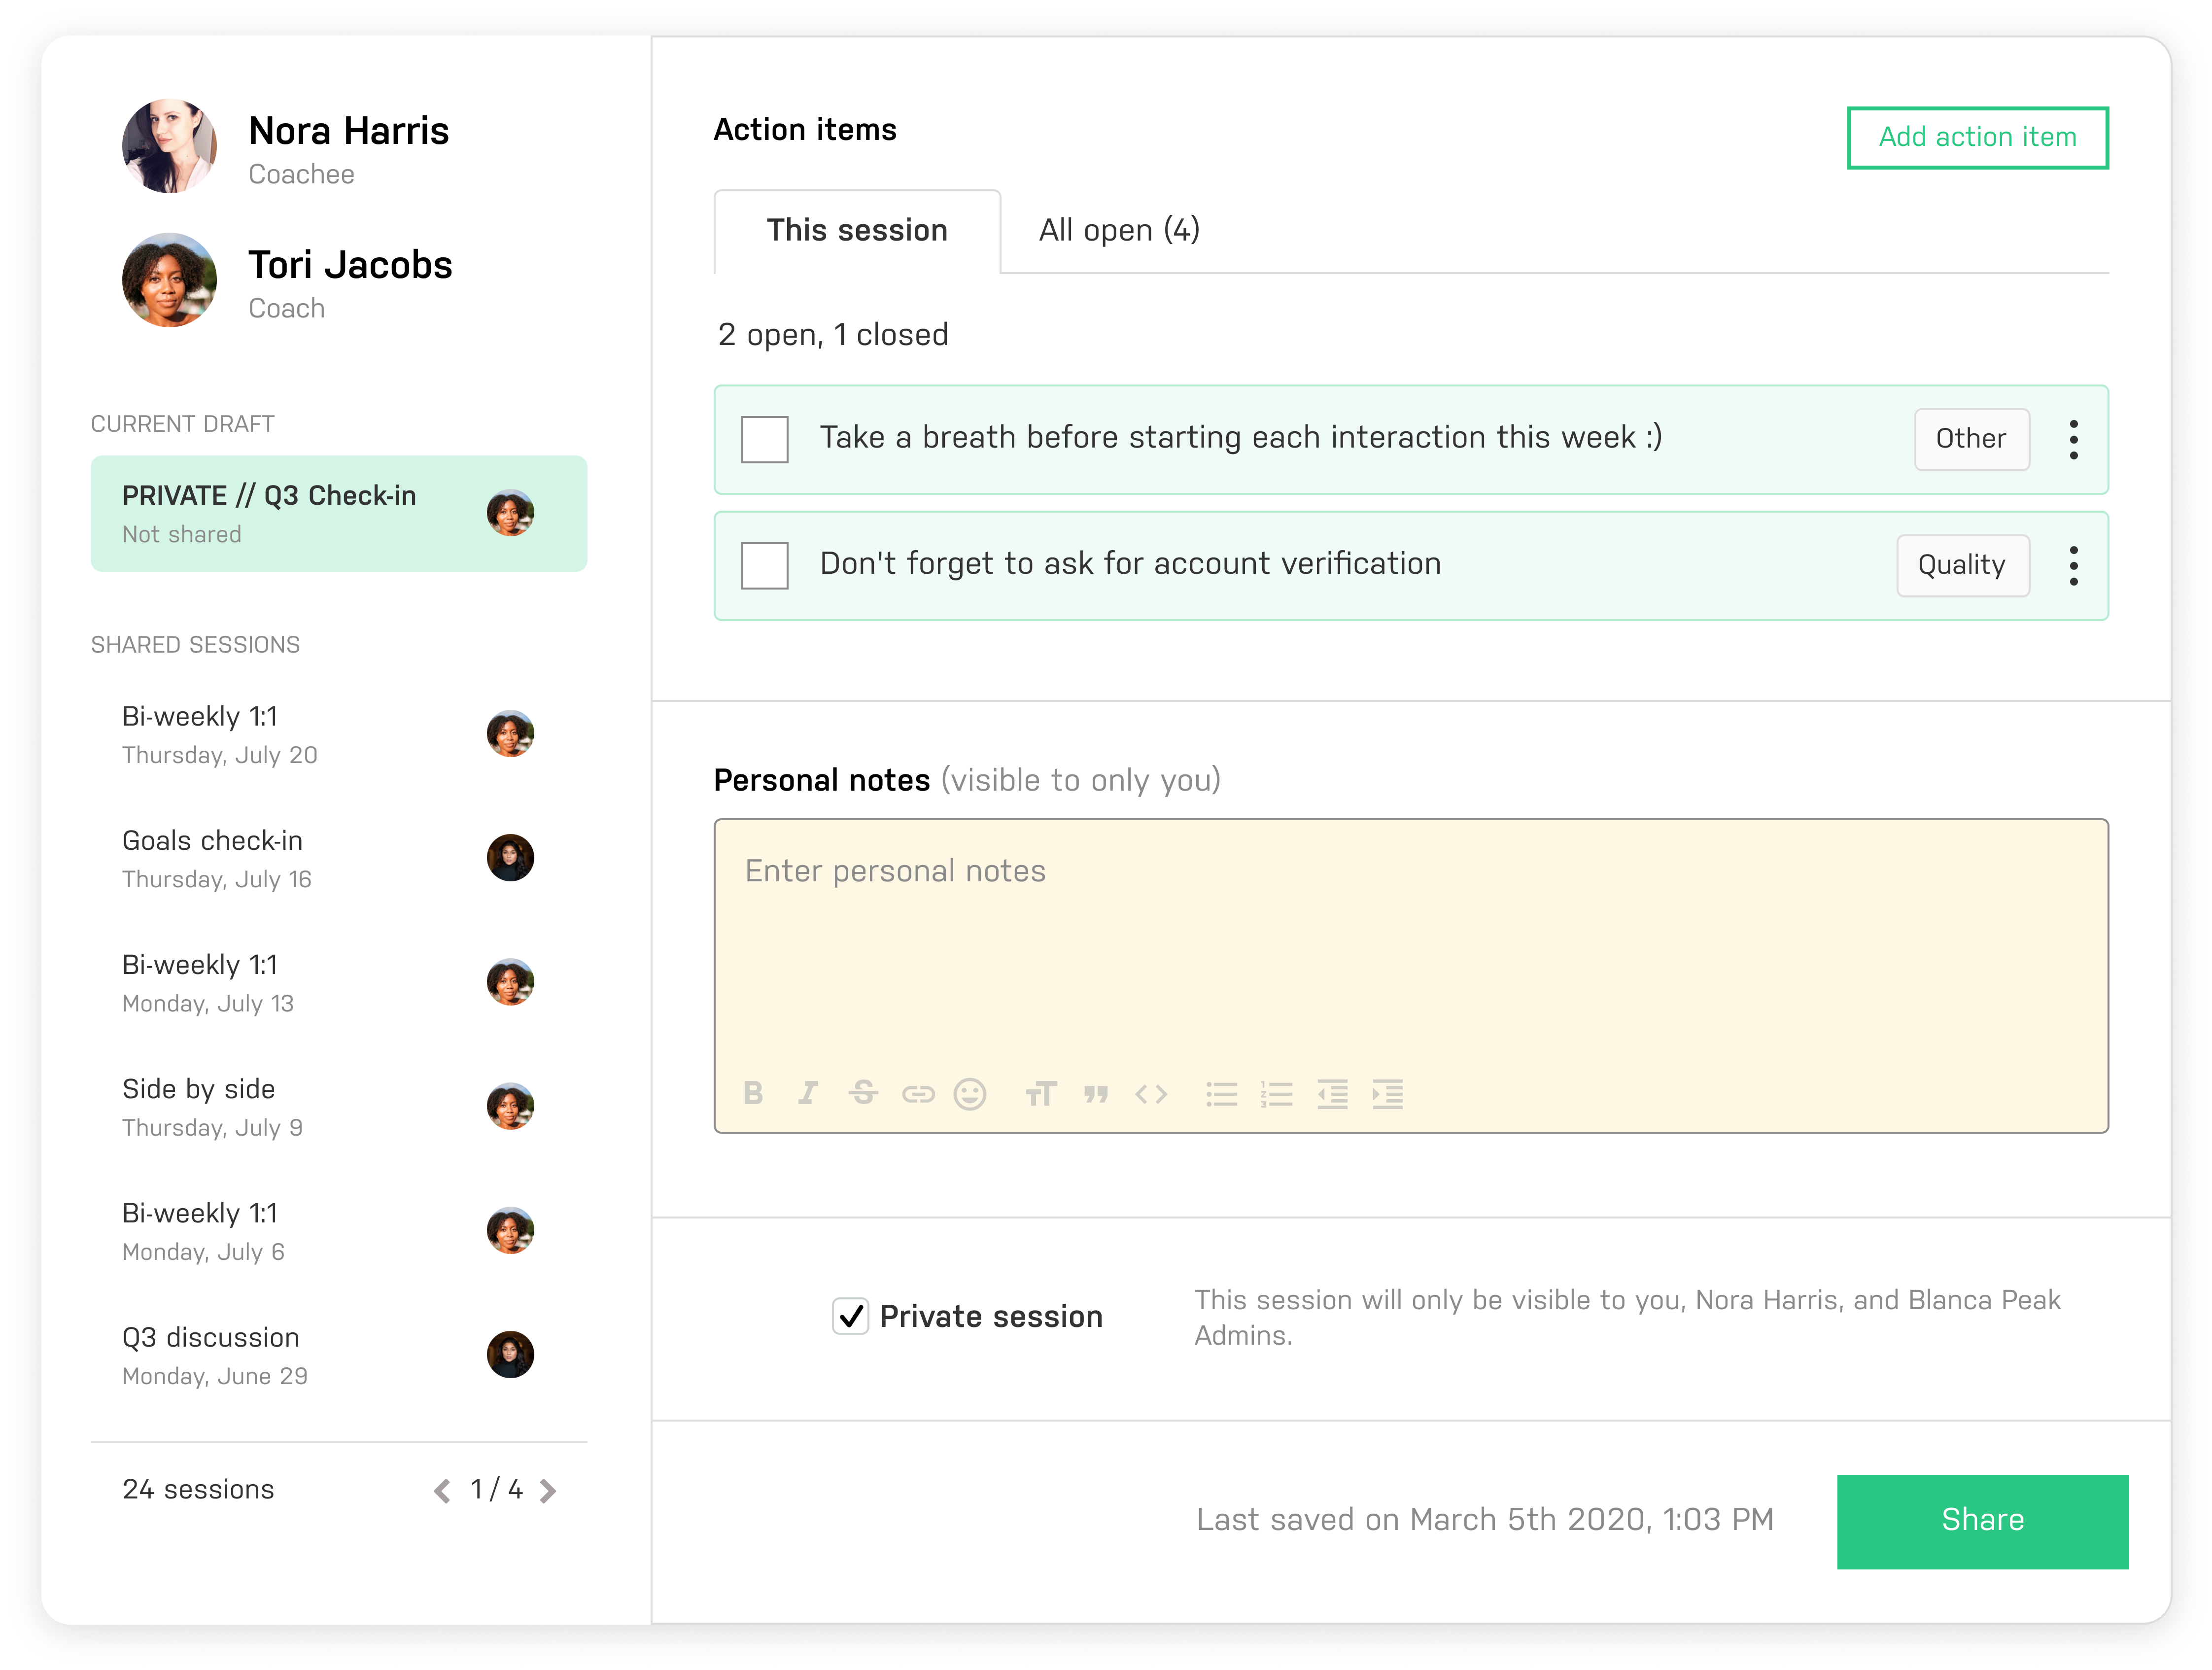
How do you use it?
Admins can now go to the 1:1s Settings tile to set the company’s default level of visibility. This will determine whether Team Leaders can view all 1:1s sessions or only those relevant to them. Coaches will now find a "Private Session" checkbox on each individual session, allowing them to ensure only the coach, coachee, and Admins can access the session once it’s shared. Learn more about using Private 1:1s here.
QA Assignments
Individual Team Members on Assignments
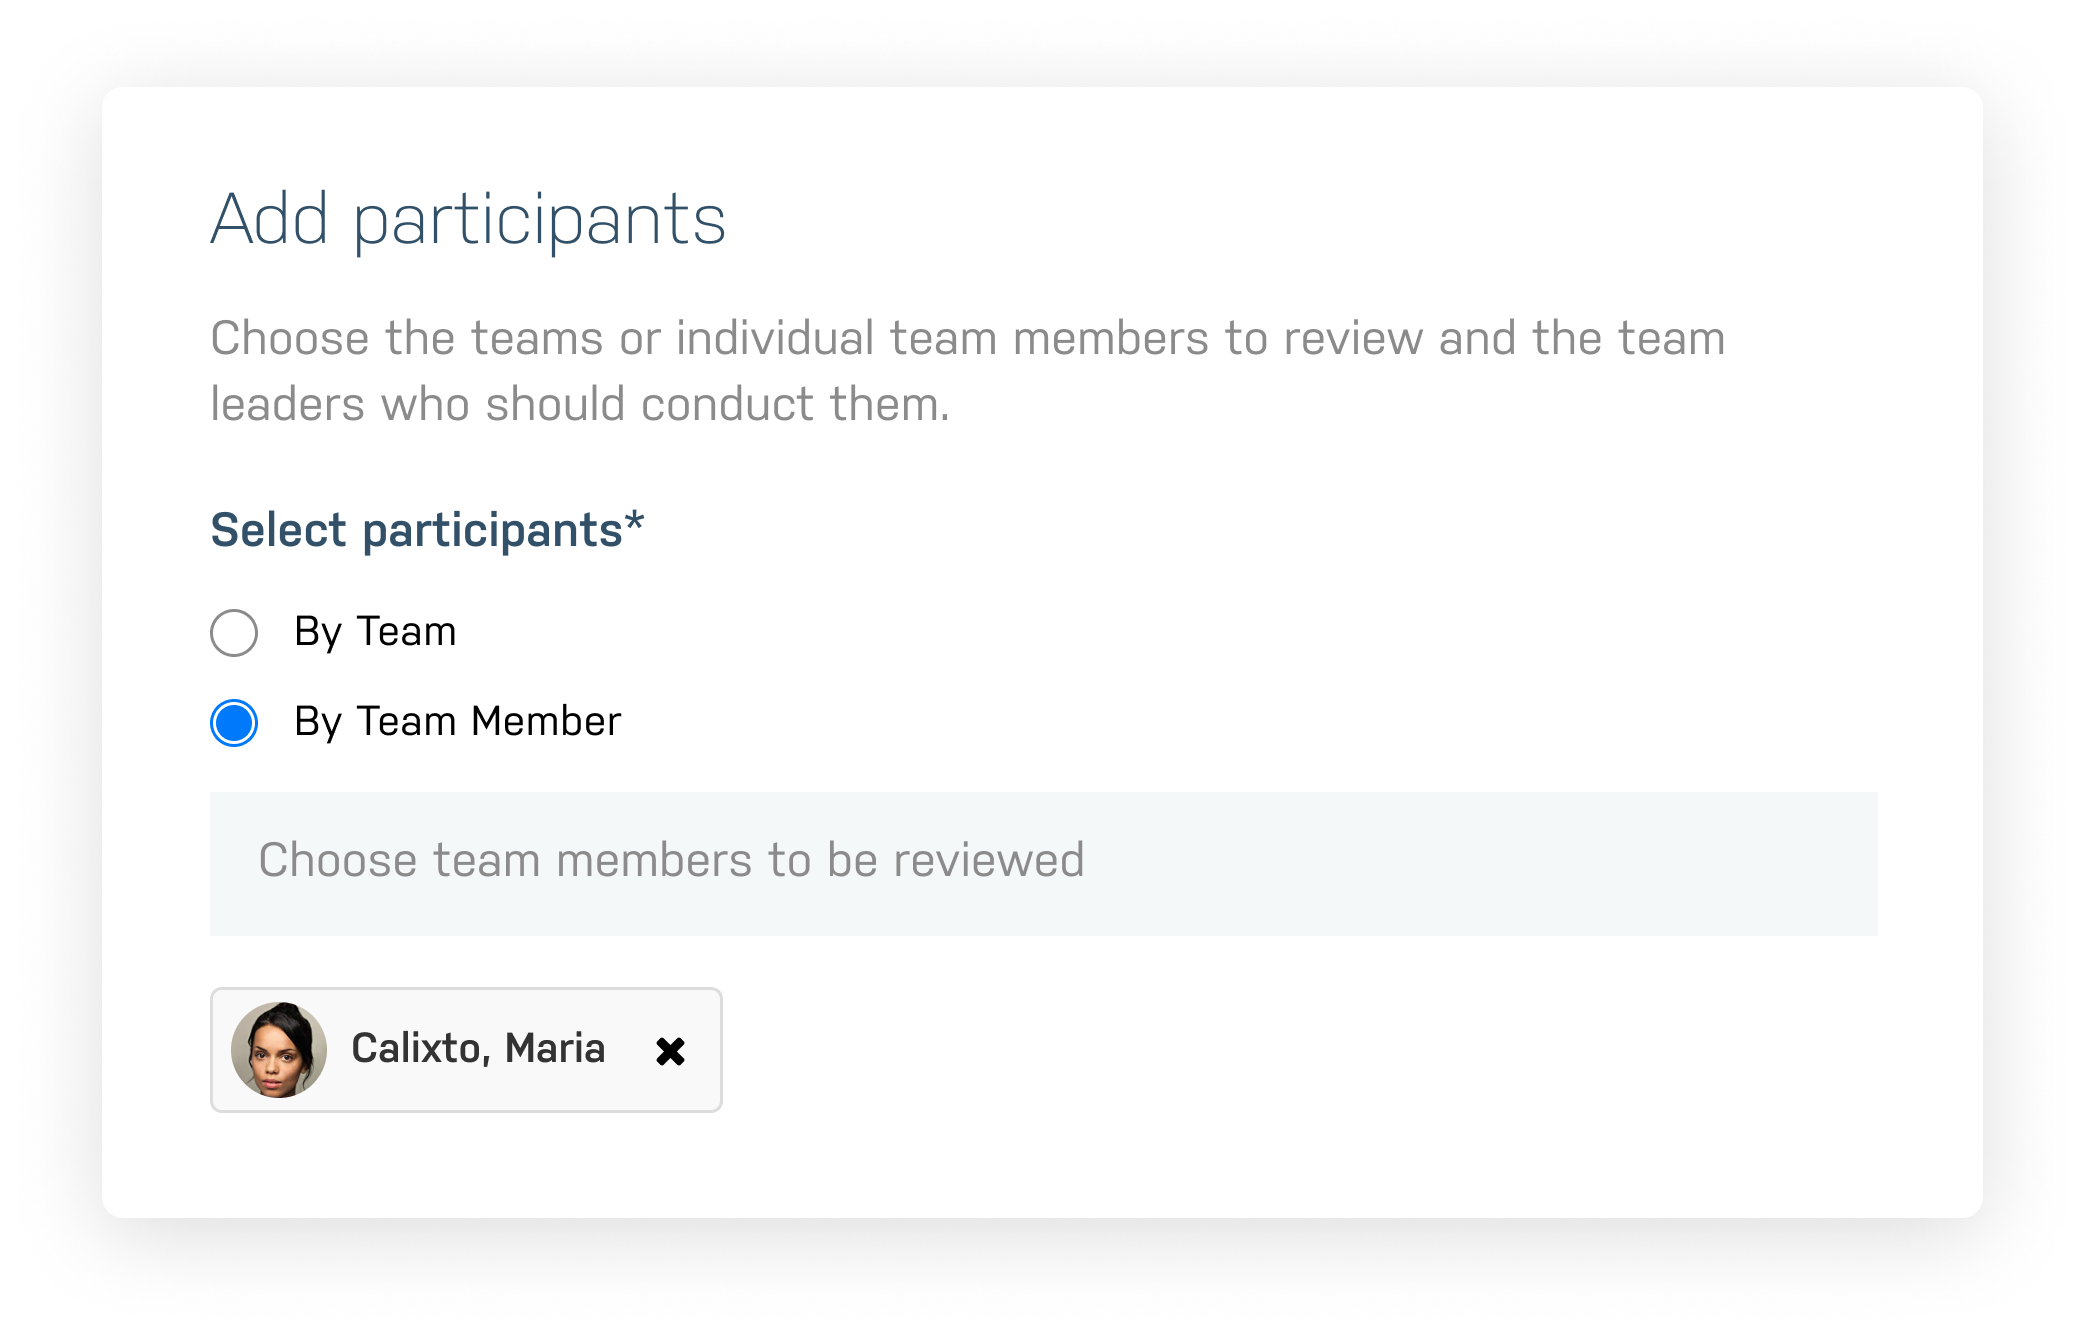
What is it?
When creating an assignment, you can now switch from picking participants by team to by team member.
Why does it matter?
This lets you create assignments to review any team member, regardless of their Team Lead. You can also select a user whose role is Team Lead as a participant if you want to review them.
How do you use it?
Simply choose the “by team member” under "Select Reviewees" when creating a QA assignment. Once you do, you’ll be able to choose specifically which team members to review.
Ability to change pre-populated team member on new QA review
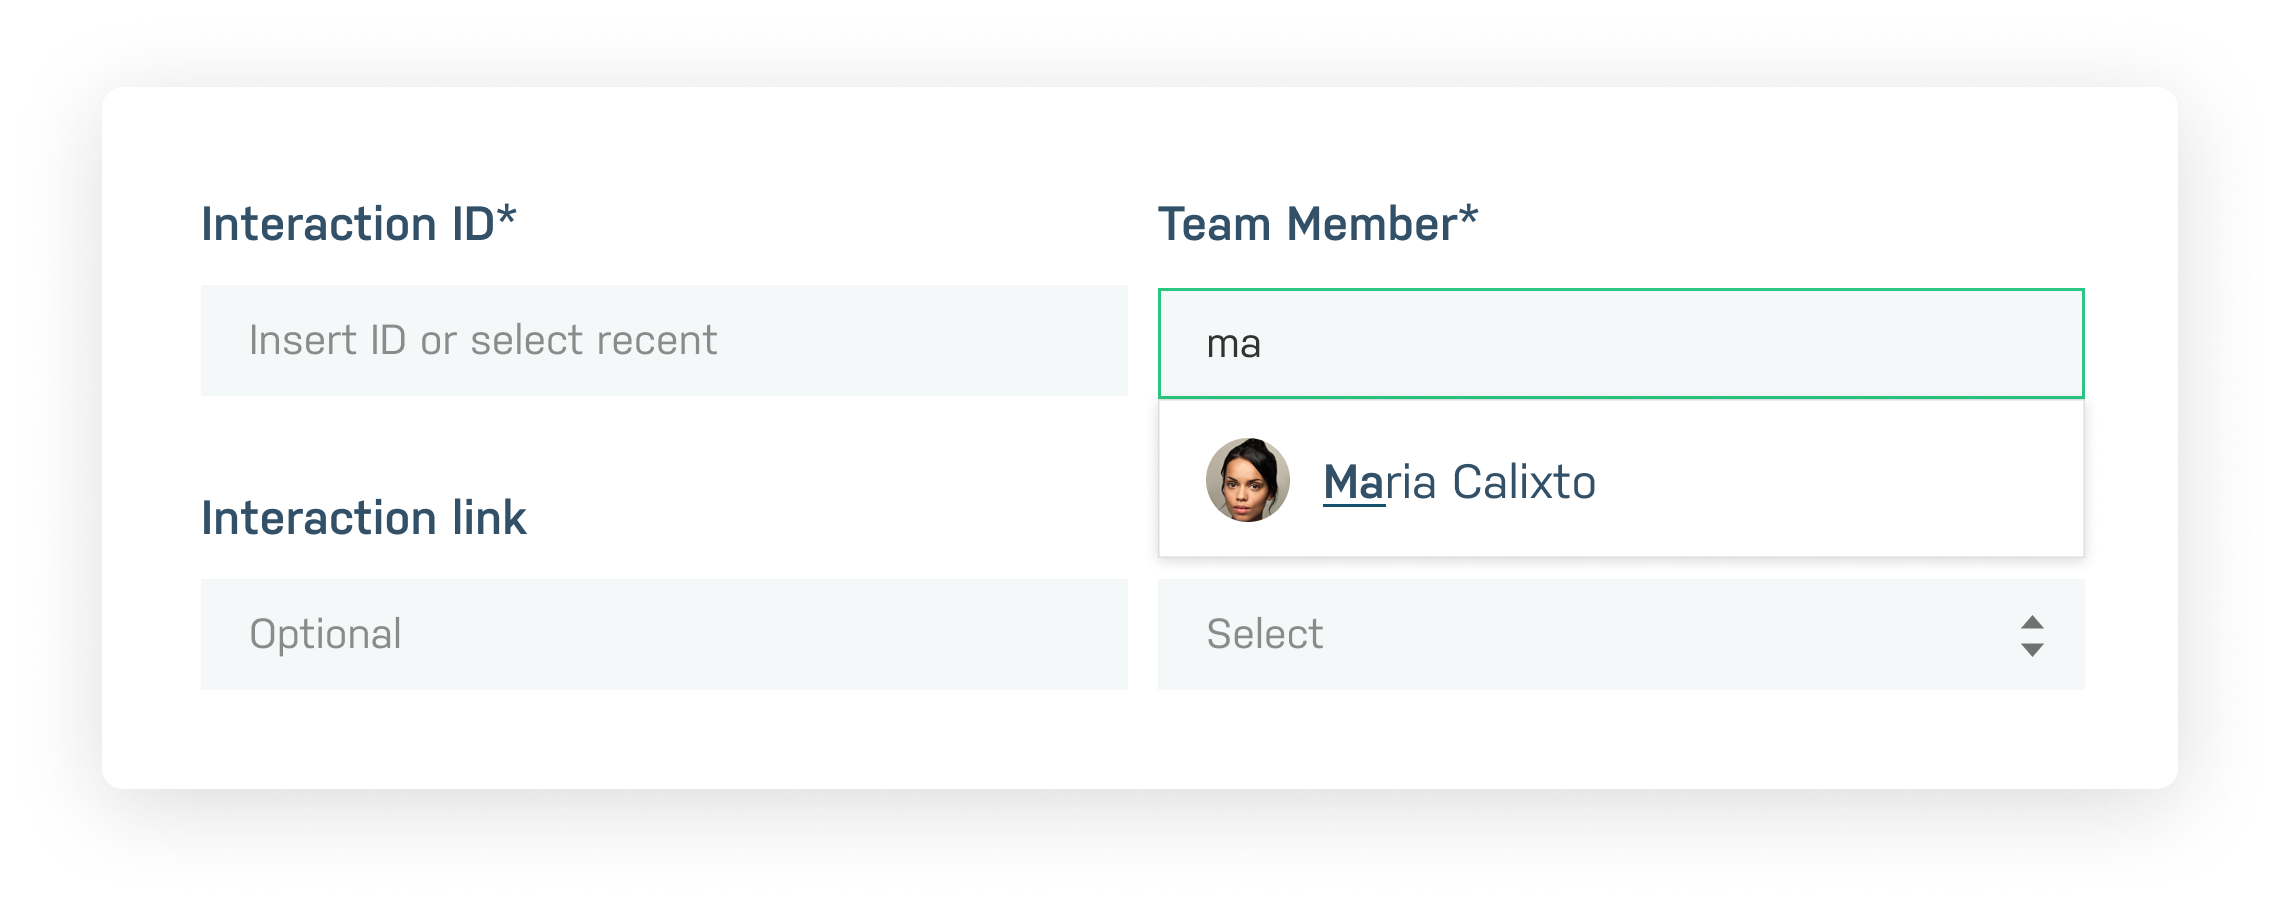
What is it?
Reviewers can now change the pre-populated Team Member on a New QA review for any reviews that are not a part of an assignment.
Why does it matter?
If you are generating a new QA review on a ticket with more than one assignee across its lifespan, you may want to review one or the other. This opens up better QA opportunities for situations in which the assignee may have changed, or teams want to review an escalation.
How do you use it?
When generating a new QA review (not part of an assignment) simply click the “Team Member” field and choose the alternative team member.
Updated QA review page

What is it?
We’ve updated the QA Review page with 3 key updates for a better user experience for our reviewers.
- We can now include custom properties in the interaction details section of the review page.
- Custom Properties can include data points like call reason, tags, or issue type for customers utilizing our Zendesk, Kustomer or Salesforce integrations.
- The review page has a more defined annotations section to better see how many annotations at a glance.
- The new scorecard section will display both the title of the scorecard chosen as well as a progress bar that keeps track of the number of completed questions out of the number of total scorecard questions.
Why does it matter?
These three updates make for a more navigable and digestible QA experience for both the QA reviewer and the reviewee. Setting distinct sections allow you to understand what needs to be completed, what’s been noted and see it all in an organized fashion.
How do you use it?
To include custom properties in your QA reviews, you’ll need to update your integration and we will need to make some changes on our end. Check out more information here.
Updated QA Navigation
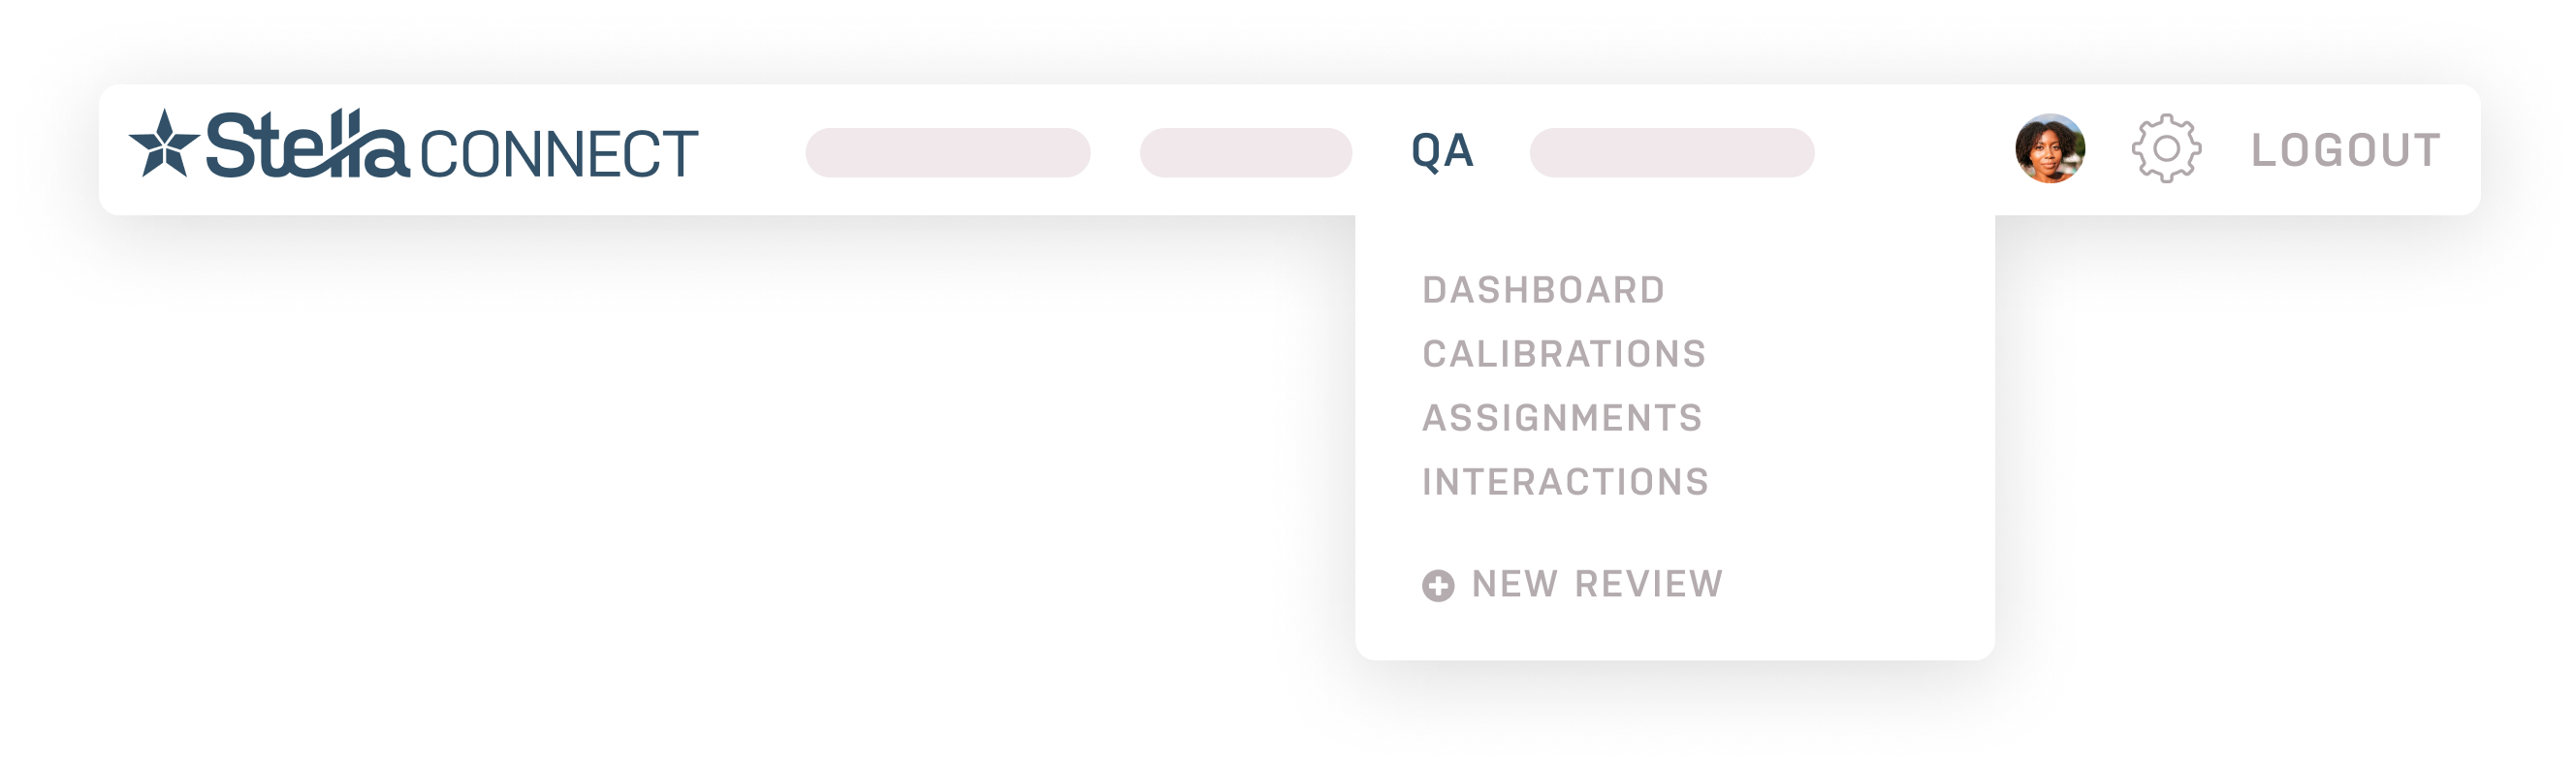
What is it?
We’ve updated our Top level QA navigation with new styling and a combined “Dashboard” item that now includes both Reporting and Reviews. The dashboard also now contains Overview and Team Members reporting, along with reviews and drafts.

Why does it matter?
This consolidation will make it easier to navigate through all the QA elements, find what is needed for your team and utilize the function efficiently.
How do you use it?
Click the QA button from your top navigation bar and you will see the new drop down option. Click “Dashboard” to get a comprehensive view of the overview, Team Members, Completed, Reviewed and Drafts all in one place.
QA Scorecards moved to QA Settings

What is it?
We have now moved QA Scorecards over to the QA Settings tile within your Account Settings. Since scorecards represent administrative settings and specifications, we have moved it to the same place where you would update any other relevant QA settings.
Why does it matter?
This allows all actions taken with QA to live together within the QA menu item, while all relevant settings and administrative options will be found together within the account settings. This will provide a better differentiation between what should be set before hand and more actionable QA functionality.
How do you use it?
Click the gear icon at the top right of your account to access your settings. From there, click the “QA” tile to see all relevant QA settings, including settings up and editing your scorecards.
Comments
0 comments
Please sign in to leave a comment.