

If your team utilizes Qualtrics to send post-support interaction surveys, you can still utilize Stella Connect's Stream for Team Members & Team Leaders to view real-time feedback as it comes in, utilize Stella Connect reporting, QA & 1:1s, and more.
Below, we'll outline the process required for integrating survey data from Qualtrics into Stella Connect!
Let's begin with an overview of the required steps:
- Ensure that you have already created a post-support interaction survey in Qualtrics
- Create a survey Action in Qualtrics to send survey response date to Stella Connect
- Create user profiles for your team in Stella Connect
- Validate your new integration!
Step 1: Ensure that you have already created a post-support interaction survey in Qualtrics
This guide assumes you have already created a post-support interaction survey in Qualtrics. To ensure the integration is successful, we recommend asking at least one agent-centric feedback question.
It’s also critical that the survey has embedded fields that include the unique identifier for the interaction that triggered your survey (like a ticket or case number), as well as a unique identifier for the agent who handled the interaction (the agent identifier is the employee's email address -- please note that the identifier used in the survey's embedded fields will need to match the email address used in the agent's Stella Connect profile exactly. More details on this in step three.)
Step 2: Sending Survey Responses to Stella Connect
In order to send your survey responses to Stella Connect, you’ll need to create a Survey Action within Qualtrics. This will trigger every time a survey response is recorded, and pass the response data from between platforms.
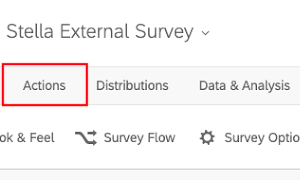
1. Select Actions
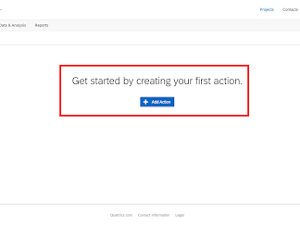
2. Next, click Add Action
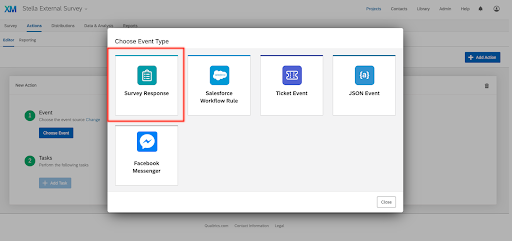
3. Click Choose Event, select Survey Response, then select Created
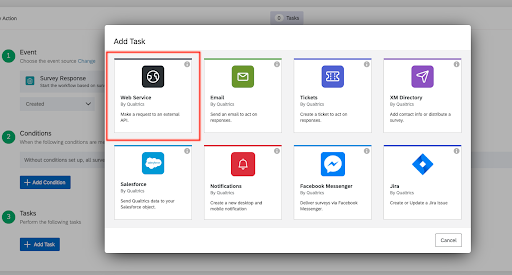
4. Select Add Task and choose Web Service
5. Fill out the Web Service Request form fields as follows:
- URL: https://api.stellaconnect.net/v1/responses/external
- Request: POST
- Content: JSON
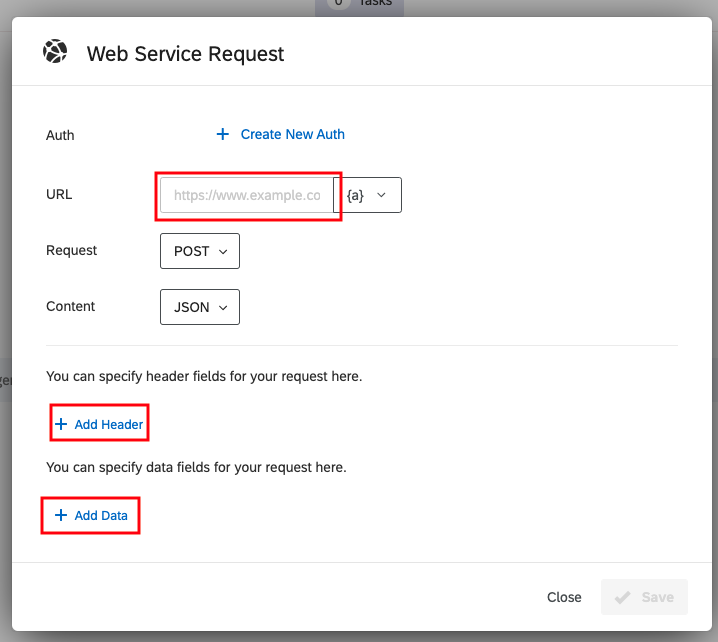
6. Click Add Header and create a header using the following:
x-api-key : YOUR_STELLA_CONNECT_API_KEY_HERE
7. Click Add Data and configure the following fields:
|
Field |
Required? |
Type |
Description |
|
employee_email |
required |
EMBEDDED DATA |
The email address of the employee who handled the interaction and will be the subject of the customer's agent-centric feedback |
|
customer_email |
required |
EMBEDDED DATA |
The email address of the customer receiving the survey |
|
customer_name |
required |
EMBEDDED DATA |
The name of the customer receiving the survey |
|
channel |
required |
EMBEDDED DATA |
e.g. email, phone, chat |
|
star_rating |
required |
SURVEY QUESTION RESPONSE |
From a single answer multiple-choice question, the value here must be from 1 - 5 |
|
comments |
optional |
SURVEY QUESTION RESPONSE |
From a text question |
|
ext_interaction_id |
required |
EMBEDDED DATA |
e.g. Salesforce Case ID, Zendesk Ticket ID |
|
external_url |
required |
EMBEDDED DATA |
e.g. Salesforce Case Link, Zendesk Ticket Link |
|
additional_question_val |
optional |
SURVEY QUESTION RESPONSE |
The integer value in Stella Connect for the answer to an additional question |
|
additional_question_comment |
optional |
SURVEY QUESTION RESPONSE |
A text answer tied to an additional question |
|
response_tags_aoe |
required |
SURVEY QUESTION RESPONSE |
From an Areas of Excellence multiple-choice question, the value here must include the name of the area of excellence in Stella Connect |
|
response_tags_aoi |
required |
SURVEY QUESTION RESPONSE |
From an Areas of Improvement multiple-choice question, the value here must include the name of the area of improvement in Stella Connect |
Step 3: Create User Profiles for your Team in Stella Connect
If you have not already, navigate to the Manage Team page in Stella Connect and create user profiles for each member of your team. Agents, their managers, and any admin-level user will need a profile created. If an agent does not have a profile in Stella Connect, any survey response data we receive from Qualtrics associated with that agent will fail.
Please note when creating your team's Stella Connect profiles that the email address identifier you embed in your survey data must match the email address used in that agent's Team Member profile in Stella Connect, with no changes in spelling or any other differences.
For more detailed instructions for creating user profiles for your team in Stella Connect, check out this Help Center article!
Step 4: Validate Your New Integration!
Trigger a survey in your source system (typically your CRM platform/ticketing system) and complete the survey. Wait about twenty seconds, then check the Stream in Stella Connect. If everything was set up properly, you should see your survey response! If you do not see the survey response after a minute or so, review the Common Issues section below.
Common Issues
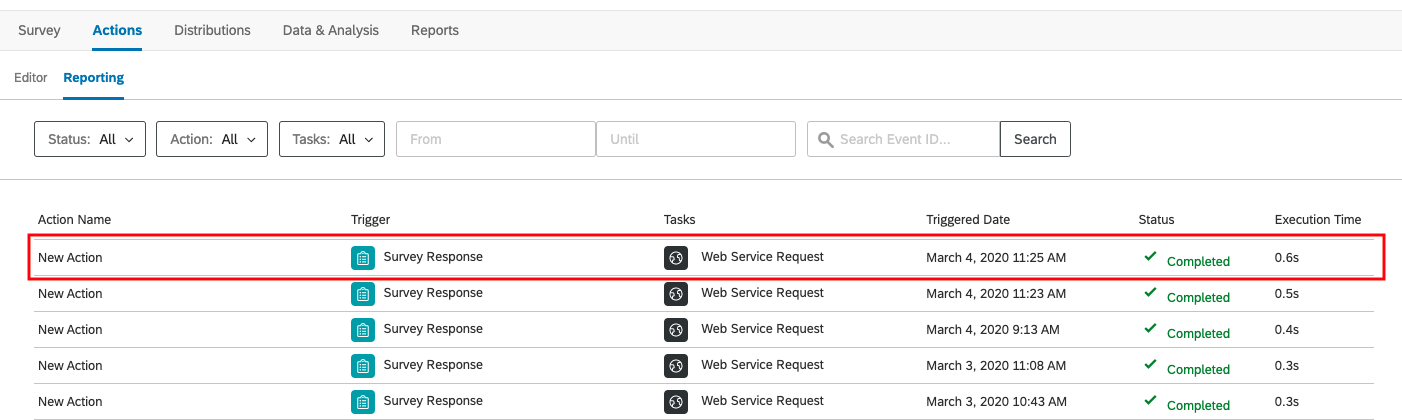
Confirm that your Qualtrics survey response action triggered
In Qualtrics, select Reporting under Actions to see a report of all successfully triggered actions. If you do not see an action with a corresponding timestamp for your test, your action may not have been set up properly.
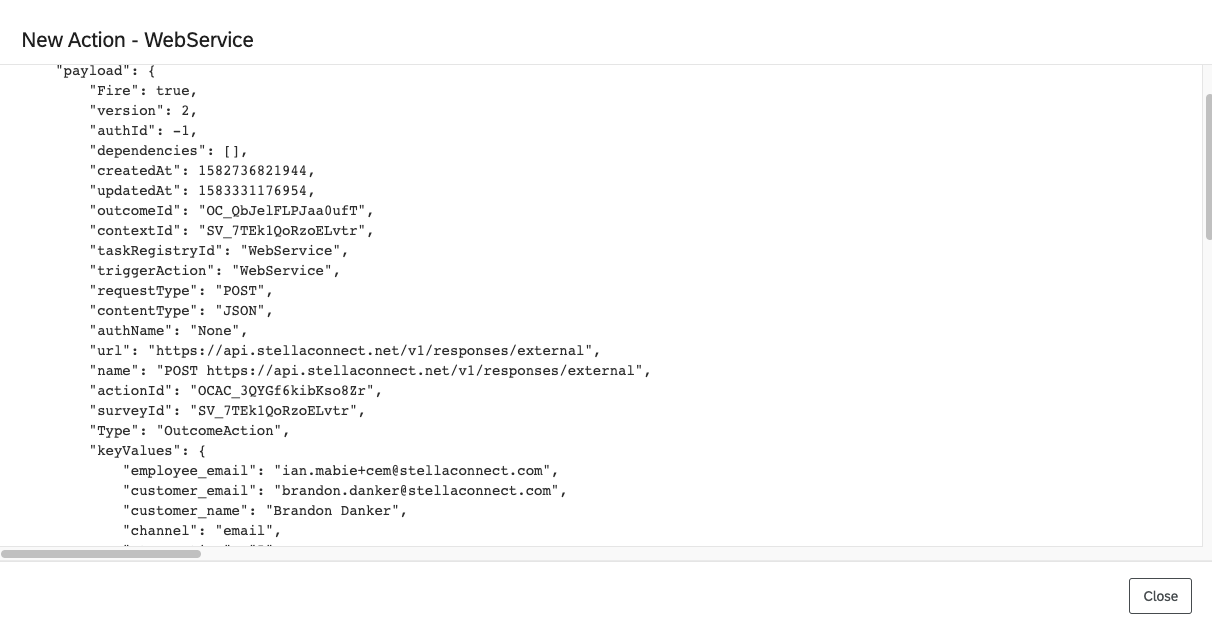
Confirm that your payload was generated properly
In Qualtrics, click on the Status column to see the payload sent to Stella Connect under keyValues. Validate that each of these fields matches the required fields listed above.
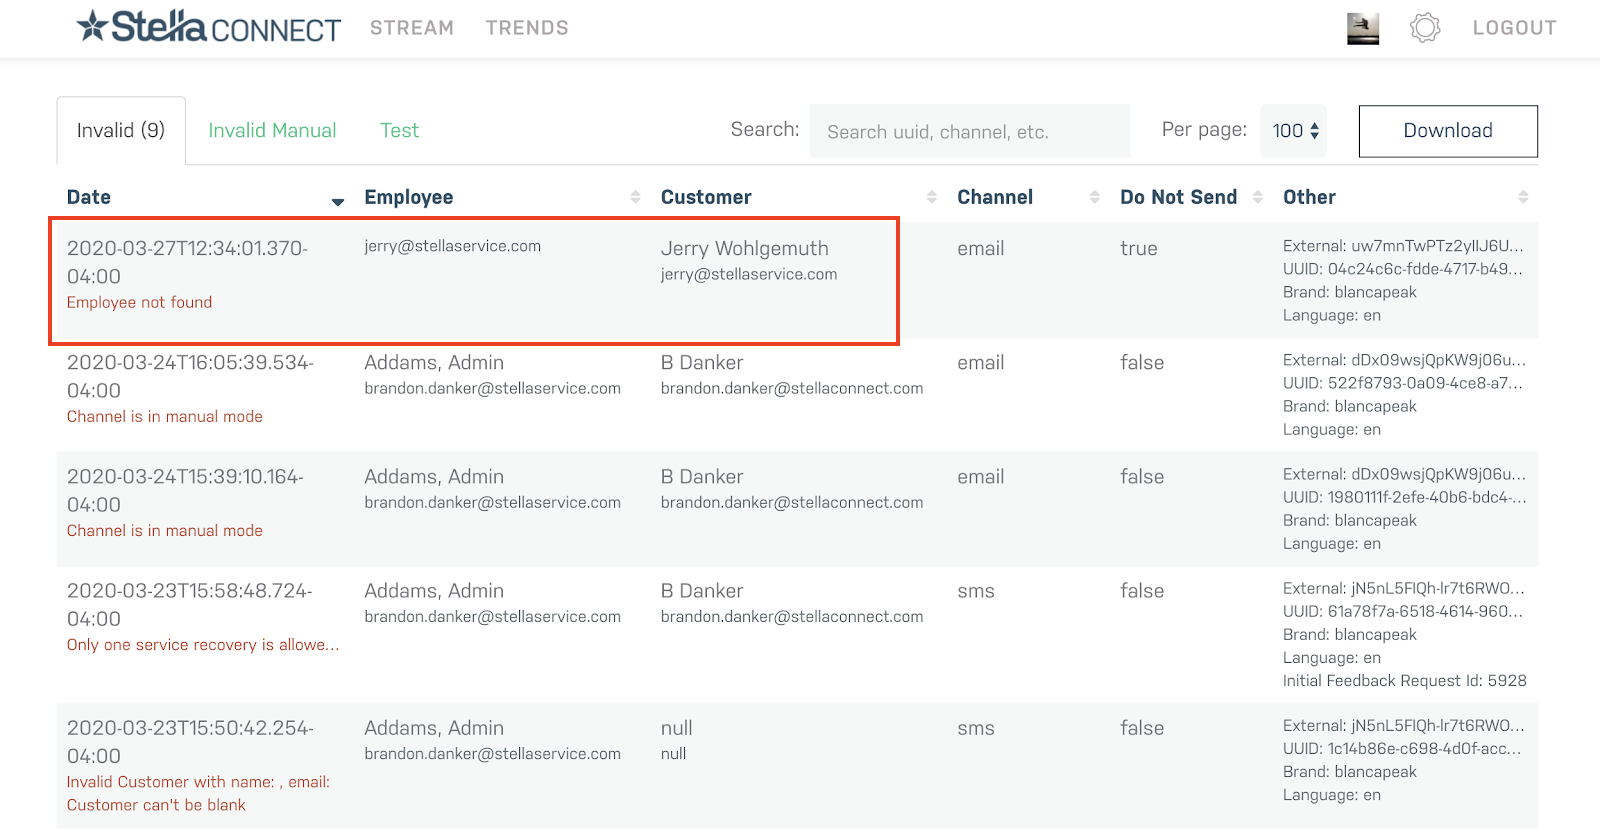
Confirm that there were no API errors
If Stella Connect receives a faulty payload, it will create an invalid survey request. Check for these on the API Status page by navigating to Settings > Integrations and clicking on the API Request Status link provided below your API keys (or use this link format for convenience, replacing {{your_stella_subdomain}} with your Stella Connect account's subdomain: https://{{your_stella_subdomain}}.stellaconnect.net/api/request_status).
On the API Status page, check the Invalid tab. Look in the Date column to the far left for a red error message indicating the error that caused the request to fail. This will indicate any fields that were malformed or missing, so you know which need to be corrected.
Comments
0 comments
Please sign in to leave a comment.